When I was a young editing whippersnapper (see, you can tell I’m older now because I used the word whippersnapper), I used to think that the editors I knew who relied heavily on the keyboard to edit were snobs. Well, some still are, but one thing that has changed has been my view on keyboard editing.
I can’t say it’s always faster 100% of the time, and there are certain tasks that must be accomplished with the mouse, but in an early stage offline edit/rough cut, you can toss the mouse aside and select clips, in and outs, create sequences, overwrite and insert clips, trim and tweak timing, and more before you ever need to touch the little rodent.
There are a lot of keyboard shortcuts scattered throughout this article. While you should read the whole thing through once, afterwards, reference this handy PDF for an ordered list of the shortcut workflow.
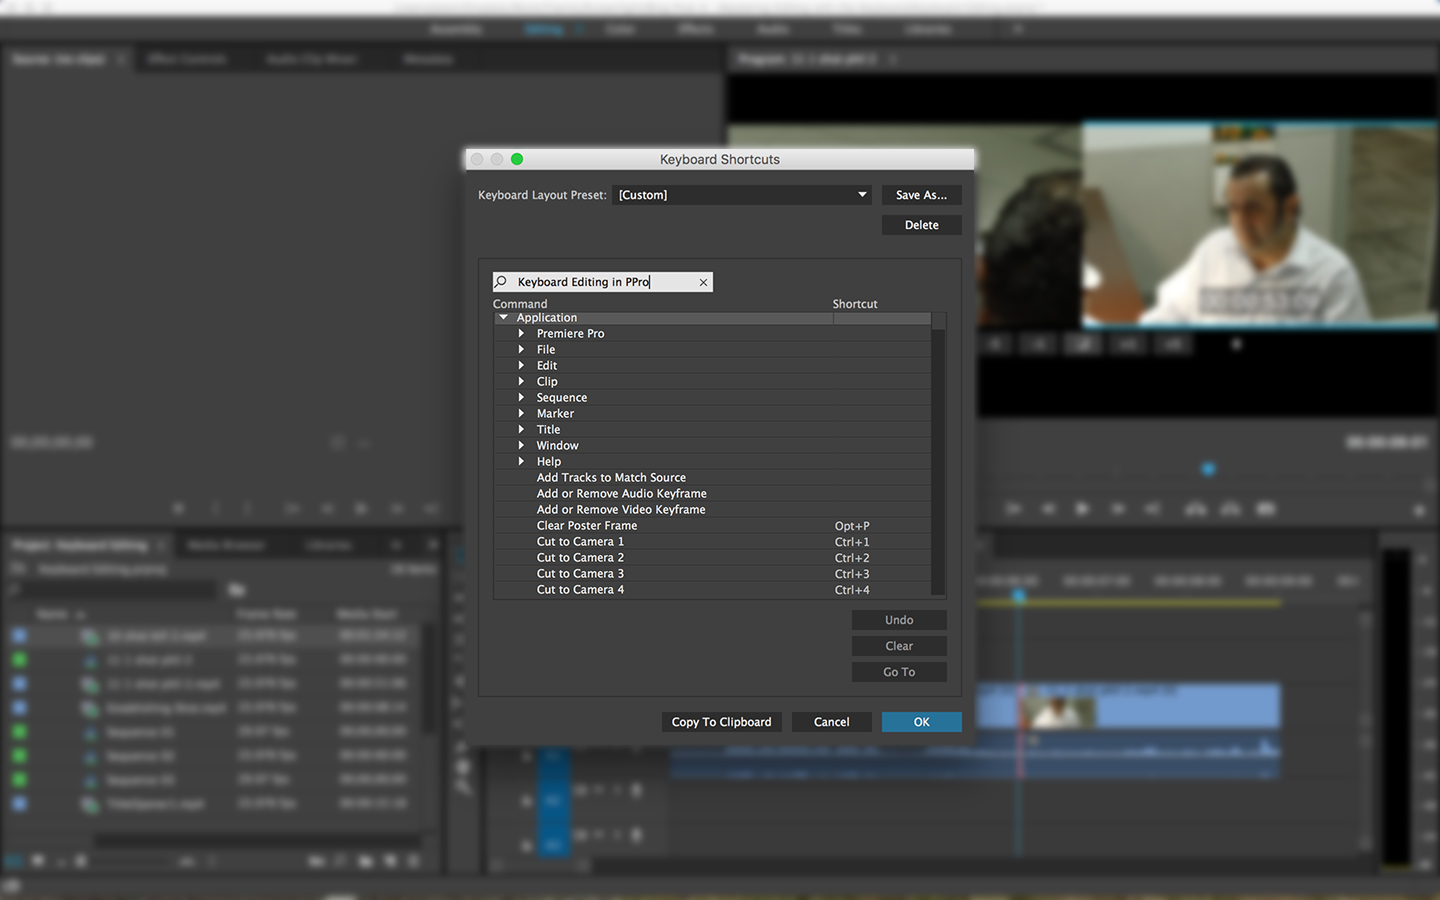
First off, to do this properly, there’s one keyboard shortcut we should ADD that Premiere doesn't have by default. Go to the Premiere Pro menu (Edit menu on Windows) and select Keyboard Shortcuts. Here’s what we want to create (and suggestions for what shortcuts to use)
Sequence from Clip: Shift+N
OK, now to the meat of it. Let’s break it down into sections:
Importing
Technically, you can access and use the Import window with the keyboard, but there are too many variations between OS versions and different file views to try and outline them all here. Obviously, Command (Mac) / Ctrl(Windows) + Iis your starting point, and depending on a few other variables, you can access all your folders and files with various combinations of modifier keys and arrow keys as well. Sometimes, things are just faster with the mouse. This is probably one of them.
The Basic Shortcuts To Know Off the Bat
Think about the most basic workflow during the rough cut stage: Select a clip from the Project Panel, load it into the Source Monitor to add in and outs, add it to a sequence and see the output in the Program Monitor. Four steps, four shortcuts:
Shift+1: Project Panel
Shift+2 Source Monitor
Shift+3: Timeline (hit multiple times to toggle through multiple open sequences)
Shift+4: Program Monitor
Selecting a Clip
Hit Shift+1 to make sure the Project Panel is active. Use your Up and Down arrows to select a clip of your choice. If it is in a bin, use your right arrow key to open a bin (in List View, which can be accessed with Command (Mac) / Control (Windows) + Page Up). To open a clip, hit Shift+O.
Playback and Adding In and Out Points
To play through your clips, forget the spacebar! You’re going to utilize the J,K, and L keys. It’s easier to learn them backwards.
L: Play(hit multiple times for 2x, 4x, 8x, 16x, and 32x fast forward)
K: Pause
J: Rewind (hit multiple times for 2x, 4x, 8x, 16x, and 32x rewind)
You can also hold K combined with either L or J for slow-motion playback or hold K and tap L or J to move in one frame increments (your left and right arrow keys also work for this).
Now here are pretty much the two easiest shortcuts out of this entire article
I: Add In Point
O: Add Out Point
Once you’ve added your In and Out points, you might want to review your clip selection.
Opt+K (Mac) / Control+Shift+Space (Windows): Play In to Out
This will automatically jump your playhead to the In Point, play the clip and automatically pause at the Out point.
Creating a Sequence
This one is a bit annoying, but we’ve taken care of one step by creating the shortcut for New Sequence From Clip. However, for some rather silly reason, this command doesn’t work with the Source Monitor active. We have to hit Shift+1 to reactivate the Project Panel, then hit our new Shift+N shortcut. Voila! Our first clip is automatically added to a brand new sequence!
Shift+N: New Sequence from Clip
Adding Clips 2 through Infinity…
Shift+1 to go back to the Project Panel, use the arrow keys to find your clip, Shift+O to open it, and repeat using J, K, L, I, and O to get your In and Out.
Now we want to overwrite the clip into the timeline with the .(period) key but wait! The playhead isn’t in the right spot after creating the new sequence! Hit Shift+3 to select the Sequence and you can use your Up and Down arrows to jump between edit points (we only need the Down arrow in this case).
Repeat these steps as often as needed. You won’t have to keep moving the playhead to add a clip to the end of the sequence as the playhead will now keep jumping to the end of any clip added from here on out.
The only extra variable is if you need to insert a clip between two others. All the same rules apply, but when it comes time to add the clip, place the playhead in the timeline between clips and use the ,(comma) key.
.(period): Overwrite
,(comma): Insert
Tweak Your Edit
After you’ve added your clips into your sequence, it’s time to refine and finesse. If you need to trim, ripple, or roll an edit point, this can be accomplished with a couple easy keyboard shortcuts. (And if you don’t know your ripple and roll functions, go learn them!).
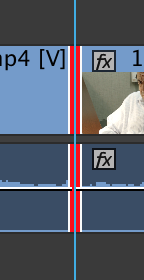
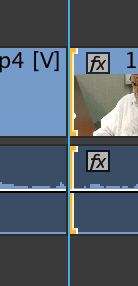
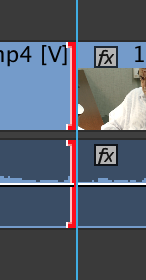
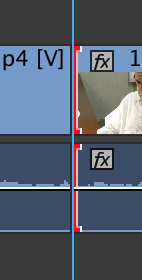
Move your playhead to an edit point and hit the T key, which enables Trim Edit mode. You will see a thick red line between the two clips which is the visual indicator for a Roll Edit. Hit Control+T (Mac) / Shift+T (Windows) multiple times to see the indicator change between five modes.
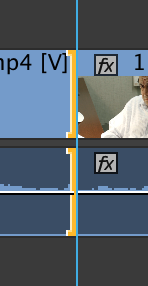
In order: Roll, Ripple Outgoing, Ripple Incoming, Trim Outgoing, Trim Incoming. Once you've selected the command you want, use Opt/Alt+Left/Right arrows to roll, ripple, or trim in the direction you like. You can also ripple clips to the playhead location by using Q and W.
T: Activate Trim Edit mode (with playhead on an edit point)
Control+T(Mac)/Shift+T(Windows): Toggle Trim Type
Opt(Mac)/Ctrl(Win)+Arrow Keys: Trim Forward/Backward
Q: Ripple Trim Previous Edit To Playhead
W: Ripple Trim Next Edit To Playhead
To review edits you make, you’ll want to know the Play Around command (Shift+K on both Mac and Windows) which jumps your playhead back a couple seconds in time, plays through and past its original location for a couple more seconds, then pauses and returns the playhead to its original location. How long the pre-roll and post-roll last can be edited in Preferences - > Playback.
Shift+K: Play Around
There’s more. Lots and lots more. With the creation of a few extra shortcuts, advanced editors can toggle and move the Source and Target panels at will to add b-roll and just the video or audio stream from a clip. But when it comes down to adding/tweaking effects, creating titles, exporting, etc., sometimes there’s nothing better than just reaching for your mouse and giving it a good clicking.
If you missed it earlier in the article, download a helpful PDF of these shortcuts here.